As of 2016-02-26, there will be no more posts for this blog. s/blog/pba/

GitHub has just announced a new feature of Gist, which enables you reporting any suspicious spams on Gist. I have to get it a thumbs-up and a doubt.

https://blogger.googleusercontent.com/img/b/R29vZ2xl/AVvXsEh5vYn1wD2EL_bWVoBRSj5hl-ca0cwh4HemRwNGdpfNAtqSsWi2gper2wW2uyC04e1ys5-6j4nVc2SGSyHV2QgYmbZ3Vc-um8b5pxBOT0y4s4lC5z_4k97QJU5daFfrrXkIW1RTbanEeHI/s800/Gist%2520Report%2520as%2520Abuse%25202013-02-27--17%253A03%253A35.png

Thumbs-up, because this new feature means they have noticed some bad activities and now have taken action on them. Just three months ago, I saw spamming on GitHub and thought that’s the most possible way to spam using GitHub. Until now, I finally realized spammers would abuse a system at maximal possibility. Whatever the system is, as long as they can create spamming contents, they would do it.

Doubt, because I am not sure this new feature can be utilized well. The nature of using Gist isn’t actually like social networking, you wouldn’t share a Gist spam, right? Or when you happen to be introduced to a Gist, it’s most likely through someone or some website you have known. To view a random Gist or a Gist spam, the best way I known is via Gist Discover, but has any of you ever browse Gist Discover page?

So, I think they still have to rely on their spam detection system to trash those worthless spams. However, I still must give credit to GitHub team for fighting against spammers by implementing this new feature. If I see any spams in the future, I will definitely put this reporting feature in a great use.

Have you ever read cd‘s manpage? If you haven’t, then you should if you don’t even know what cd or cd - does. The manpage is of POSIX Programmer’s Manual, so the content is not only for the Bash, but for every POSIX-compliant shell.

1   cd brings you(r) home

It means literally, like, seriously bringing you home or bringing your home to you.

/path/somewhere $ cd
~ $

I believe many people have discovered this on their own like me. You just happen to run cd without giving any argument, then you wow’d for finding out this quick way to get back to home.

I remember once I was talking to someone, who didn’t even know about this. It’s more amazed for me than for him, I wondered how on Earth this guy had been doing in order to get back to home.

2   cd - for last directory

I don’t use this argument - often, but when I need it, it’d save a lot of typing time especially you keep switching between two directory.

~ $ cd /path/to/somewhere/deep
/path/to/somewhere/deep $ # do somegthing
/path/to/somewhere/deep $ cd /path/to/other/place/way/way/deep
/path/to/other/place/way/way/deep $ # do something
/path/to/other/place/way/way/deep $ cd -
/path/to/somewhere/deep $ # now we are back
/path/to/somewhere/deep $ cd -
/path/to/other/place/way/way/deep $ # we are back to the other

Note

If you actually have a - directory, use cd ./- to get into it.

3   CDPATH is directory search path

Before I read the manpage, I had never thought of it, even I seemed to have heard of it or seen it. It’s like PATH, but only for searching directories when using cd.

~ $ mkdir foobar
~ $ CDPATH=$HOME
~ $ cd /
/ $ cd foobar
/home/login/foobar $ # bang!

You can enter the ~/foobar from anywhere, just by typing cd foobar. It’s like you can run foobar from anywhere if it’s executable and it’s searchable via PATH.

It can also be auto-completed via bash-completion. On Gentoo, run eselect bashcomp enable base to enable it.

Although I find this could be useful, but I prefer more specific way to change directory, like my own g script for quick directory switch.

4   cd !$ comes in handy

This relies on Bash’s History Expansion, so this is not for every shell. But it’s very useful when the last argument is a directory from previous command, and you need to get into for further actions. !$ is your best friend.

~ $ mkdir long/long/directory
~ $ cd !$
~/long/long/directory $

Redacted font is a very interesting font and it’s inspired by another font called BLOKK. They are the inspiration of this redact.js script, a different way to redact just for fun.

Note

This page requires JavaScript.

1   Redact!

Try the following button and refresh. Believe me, you will need to hit refresh button on your browser.

1.1   Bookmarklet

Bookmarklet: Redact!

Drop it onto your bookmark bar, and start to redact every page like top secret agent. ;)

3   The code

The main process code is listed below:


// By Yu-Jie Lin, MIT License, see full code at
// https://gist.github.com/livibetter/5018941

function redact_TextNodes() {
var nodes = getTextNodesIn(document.getElementsByTagName('body')[0]);
for (idx in nodes) {
var node = nodes[idx];
node.nodeValue = node.nodeValue.replace(/([^\s])/g, '█');
}
}

function redact_inputs() {
var elements = document.getElementsByTagName('input');
for (idx in elements) {
var e = elements[idx];
if (typeof(e.value) != 'string') {
continue;
}
e.value = e.value.replace(/([^\s])/g, '█');
}
}

This script actually is similar to a script I wrote two years ago for Valentine’s Day. It replaces every character with this Unicode character “█,” U+2588: FULL BLOCK.

4   Thoughts

As you may have noticed, it doesn’t work for some elements, such as pseudo element lik :before. It can be done but that would require much more efforts. The fonts wouldn’t have such problems, you simply override all element’s font-family and that should be it. Also, the redaction isn’t revertible, but the font approach is.

You may also notice that the length of text has changed. That’s because every character has the same width as FULL BLOCK. I believe this would also happen on font approach, just it may be less noticeable. If combining character had redaction, then this JavaScript approach would be perfect with such character, because there would not be any length difference.

The images ain’t redacted, either. It is easy to use some “image placeholder” services to replace them, but I am not up to do that since redact.js is just for quick fun.

About one month ago, I had this idea of making a feed which collects all my activities from different websites I actually use. Ultimate YJL, this is what I call it. It was built with Yahoo! Pipes, now with Google App Engine.

Note

The switch from Yahoo! Pipes to Google App Engine was done on 2015-08-21. (2015-08-21T06:01:41Z)

I am not so sure this feed would be helpful or anyone would actually want to subscribe to it. I’ve added it to yjl.im, it looks proper to be there. It may seem a little over-kill, but if I can make one, why not? Right?

1   Included feeds

2   Missing feeds

I list the missing ones and hopefully these websites would provide the feeds in the future.

Bitbucket doesn’t provide any public feed of a user, at least I can’t see any from its new webpage. I think there was one in the older page, not really sure. I have thought about using private feed and filter out the private parts, but that really sounds like a dangerous idea. And yes, Bitbucket has provided API, but it takes a lot of work to piece together a comprehensive feed for all activities of a user on Bitbucket. Just look at GitHub’s feed, one feed, period.

boxes is an awesome tool for coders who has ECSLCS syndrome (Even Comment Style Like Crazy S**t). I have a tendency to section codes into groups, then dissect into small pieces, and then unnecessarily break down to lines, whenever I read a code. I’d put up a comment block to mark a section, then a smaller one for sub-sections, then one-liner comment for a line of code.

When you can’t even maintain your own coding style, you do not even dare to think your comment styles all look the same. If one’s code is a mess, his or her comments most likely make the whole file hard to read. I usually can begin with a nice start, but after a few edits or a month, my code would look like being fed into paper shredder twice in different entries of angle.

You can imagine when I saw boxes, it’s like a believer witnessing a wonder. I asked myself why haven’t anyone told me about this tool before. Anyway, I have set up my own configuration for a few languages, such as Python, C, CSS, JavaScript, shell, etc. Also set up new keybindings in Vim with my almost-zero-Vim-scripting skill.

To give you a quick idea, how you use it, see the following output:

$ echo 'heading 1' | boxes -d h1-poun
#############
# heading 1 #
#############

$ echo 'heading 2' | boxes -d h2-pound
# heading 2
############

$ echo 'normal comment' | boxes -d cmt-pound
# normal comment

boxes can not only comment, but also uncomment. Simply supply with -r, the comment text will be reverted back, whatever it adds it removes:

$ $ cat | boxes -d h1-pound -r <<EOF
> ##########
> # foobar #
> ##########
> EOF
foobar

It ships with a lot of default styles, including some crazy ones, really really crazy styles, even I can call that. Anyway, it’s a program with long history for almost 14 years (1999/03/18). Probably older than your kids or even you?

I honestly hope this would improve the readability of my code, keep my code would look consistent, at least for my comments. My coding style is still a mess like chaos theory. One problem at a time, right? Someday, I would code like in google-styleguide or airbnb. To be perfect straight, I don’t even have any strength to compose of a style guideline which I would like to follow. Deciding 2-space or 4-space is hard enough, luckily, in Python, I don’t have to decide where to put the closing brackets for control flow statements.

I was trying to find a package I have never installed, and I found terminal-colors. It’s not as if I had a problem with terminal with 256 color, but this script did bring back the time I tried to make my terminal emulator to display 256 colors correctly. Nowadays, you shouldn’t have any issues for having 256 color support, it should work just out-of-the-box, not in your favorite terminal, not in Vim, not in with terminal multiplexer, or in any programs. It’s been working well for a few years.

Note

This post definitely is the most colorful post I have ever written, if your eyes are blinded by it, I take absolutely no responsibility of that. You have been warned. ;)

I would describe the feeling is somewhat nostalgic, even it’s just a few years. I bet some of you remember 256 color mode of xterm.

If you know other scripts, feel free to link to the script and attach a screenshot in the comment if you want to.

1   256color2.pl

256color2.pl, by Todd Larason, probably is the most standard script to test a terminal’s 256 color capability. I could recall I was changing term string, setting Vim variable up, editing screen or tmux configurations, restarting, just to see those beautiful smooth color blocks.

https://blogger.googleusercontent.com/img/b/R29vZ2xl/AVvXsEhsZXCv8g6iWA-CxtPmmGZUyeAACOBH2LjOAH6QNcO9nBUnXtTvMpVxYm_urqDZZUraWm2Fq31DdpllXHswAkH9g7gsGbXRf4DMbP2npyn-WoLsy0hjRebdgI_xw4JjLnJrFeV2VejZi9Q/s800/2013-02-21--15%253A13%253A35.png

2   ansi --colortable

ansi is a command-line tool to help shell scripting to have color, change position, and a few other things. --colortable is one of them.

https://blogger.googleusercontent.com/img/b/R29vZ2xl/AVvXsEiGliOSQ2lthkE56K0q0jVL1uge4XMY5RGkcNAmzeUUzfS-3Af3lUs9g1uFGazXst2LSWKxJiDlSvuAUEadOoyVKE8tWaYYWjOArWYwvLAsdmP9d4Zn9llNnSEVknu6BmPtEALGFke9FUY/s800-Ic42/ansi.colortable.gif

3   ANSI_test.sh

Shamelessly, I have to plug in one of my own, ANSI_test.sh. It’s mainly written for the SGR (Select Graphic Rendition) testing in a terminal, not the colors part. I can’t remember if I actually use it for something, or just to fill in these color scripts had been missing.

https://blogger.googleusercontent.com/img/b/R29vZ2xl/AVvXsEiN6vwAdicaMUFziXqCK6q_K70VZqXMNKXXhqTgAufhDfpRSVaDuTM3Dy240raE27NkRZPdQuDSZua98K_ju_bhHQSKfylMRc68-9EQJrWw0eSqedoU2xy7qq0yM0eRtO-qEOze5fErEJg/s640/2013-02-21--15%253A08%253A06.png

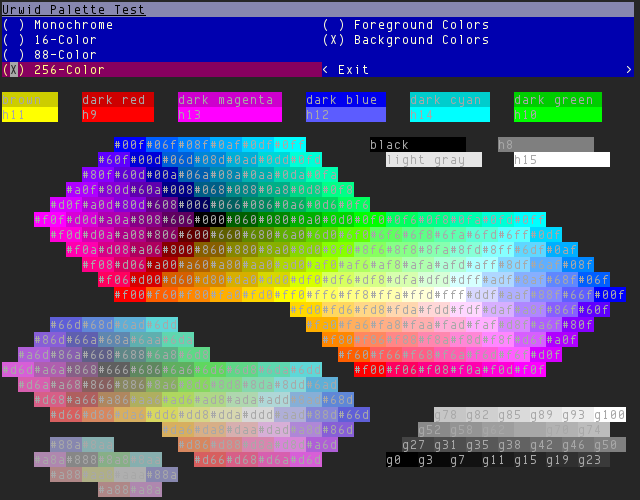
4   palette_test.py from Urwid examples

Urwid has a simple palette_test.py with UI for palette testing, of course, as you may know Urwid is a console user interface library for Python. This script is only interactive script I have know, it’s easier to switch between color modes, even monochrome.

https://blogger.googleusercontent.com/img/b/R29vZ2xl/AVvXsEhVtY0Ch1TSQ0HXjL7IQvhJnRR2Him3P0-7-aHrBBVGO7GnhRe85wSPHl1TZTG5KXm3C8o-ebzQ6MOWoeMyZ6aZzcCIWWSNTmuA9ZBMkpfK3hOUV2iYthHYErVj4IuK3qdnj0qrlXgHOW0/s800/2013-02-21--15%253A19%253A50.png

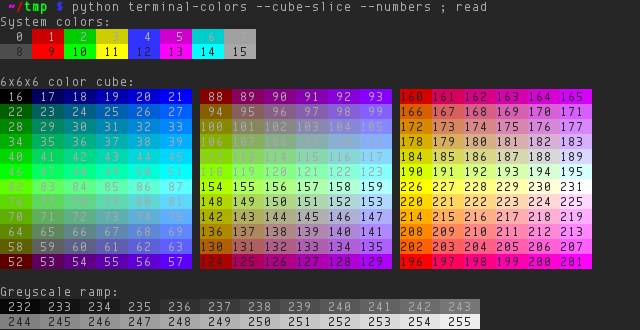
5   terminal-colors

terminal-colors is a Python script, by John Eikenberry, with many options to play with, and you can use it to convert color between 88-color and 256-color. I’ve also made a video for this script.

https://blogger.googleusercontent.com/img/b/R29vZ2xl/AVvXsEinYFTpDP_xqyIaCTEwi8h6OErCPP5yldND5Jc0FwHaxfcM0w5q0c4AcAS1fgs-TgdmDAWhWRwplL8ca__tzGuXBflsHw4LGXGNJoDQDjY15OhcW1obdUsBege3JeHJ4L1EPE9d25FPl5U/s800/2013-02-21--15%253A03%253A58.png

6   xterm_colour_chart

xterm_colour_chart, by Ian Ward, also the creator of Urwid, has some unusual and fun presentations, clouds, whales, cows, …. Guess which one the screenshot is showing?

https://blogger.googleusercontent.com/img/b/R29vZ2xl/AVvXsEj2qP7Taqs7pSEmYZ2uz7bE3znWtrsTYWcRyceIc27oBbAG5wMGftx-y24C2p7ATZEhhlycifLt7Ds0b73Ru0WZvr4lYJPVKZRupQotADDHH1ctJo6cEWclN5uKPFk8Q6y8bePXJJYKzuQ/s800/2013-02-21--15%253A26%253A18.png

Psst… I included the command in screenshot.

While I was coding lnkckr, I needed to test for HTTP status code since it’s a library for link checking. I could use some common known and big and considerably stable website like Google. But that would never be reliable when running unittest with those.

A quick search I found is a great website: httpstat.us. I immediately used it in doctest at first, then I realized that it’s very slow, even with just a couple of checks. A single request to httpstat.us using curl took almost one second to finish. Too slow for testing, you don’t want to wait for minutes for tons of tests.

I wrote a quick code as shown below, definitely inspired by httpstat.us, you can also find it on Gist.

#!/usr/bin/env python
# Simple HTTP Server which echos status code indicated by request path
#
# Copyright (C) 2013 by Yu-Jie Lin
#
# Permission is hereby granted, free of charge, to any person obtaining a copy
# of this software and associated documentation files (the "Software"), to deal
# in the Software without restriction, including without limitation the rights
# to use, copy, modify, merge, publish, distribute, sublicense, and/or sell
# copies of the Software, and to permit persons to whom the Software is
# furnished to do so, subject to the following conditions:
#
# The above copyright notice and this permission notice shall be included in
# all copies or substantial portions of the Software.
#
# THE SOFTWARE IS PROVIDED "AS IS", WITHOUT WARRANTY OF ANY KIND, EXPRESS OR
# IMPLIED, INCLUDING BUT NOT LIMITED TO THE WARRANTIES OF MERCHANTABILITY,
# FITNESS FOR A PARTICULAR PURPOSE AND NONINFRINGEMENT. IN NO EVENT SHALL THE
# AUTHORS OR COPYRIGHT HOLDERS BE LIABLE FOR ANY CLAIM, DAMAGES OR OTHER
# LIABILITY, WHETHER IN AN ACTION OF CONTRACT, TORT OR OTHERWISE, ARISING FROM,
# OUT OF OR IN CONNECTION WITH THE SOFTWARE OR THE USE OR OTHER DEALINGS IN
# THE SOFTWARE.
#
# Gist: https://gist.github.com/4228803
# Code from lnkckr: https://bitbucket.org/livibetter/lnkckr
# Inspired by: http://httpstat.us


try:
from http.server import BaseHTTPRequestHandler, HTTPServer
from urllib.parse import unquote
except ImportError:
from BaseHTTPServer import BaseHTTPRequestHandler, HTTPServer
from urlparse import unquote
import re

HOST = 'localhost'
PORT = 8000
H = 'http://%s:%s/' % (HOST, PORT)


class Handler(BaseHTTPRequestHandler):

RE_CODE = re.compile(r'/(\d{3})')

def do_GET(self):

headers = {}
body = None
m = self.RE_CODE.match(self.path)
code = int(m.group(1)) if m else None
if self.path == '/' or code == 200:
code = 200
elif self.path == '/loop':
code = 302
headers['Location'] = '/loop'
elif code in (301, 302):
headers['Location'] = H
else:
code = 404
if 'Location' not in headers:
headers['Content-Type'] = 'text/html'
body = unquote(self.headers.get('X-Echo'))

self.send_response(code)
for k, v in headers.items():
self.send_header(k, v)
self.end_headers()
if body:
self.wfile.write(body.encode('utf8'))

def do_HEAD(self):

self.do_GET()


def main():

try:
httpd = HTTPServer((HOST, PORT), Handler)
httpd.serve_forever()
except KeyboardInterrupt:
pass


if __name__ == '__main__':
main()

Example command, which returns "hello\nworld\n" from the server:


$ time curl -o - -v --header "X-Echo:hello%0aworld%0a" -L localhost:8000/200
* About to connect() to localhost port 8000 (#0)
* Trying 127.0.0.1...
* connected
* Connected to localhost (127.0.0.1) port 8000 (#0)
> GET /200 HTTP/1.1
> User-Agent: curl/7.26.0
> Host: localhost:8000
> Accept: */*
> X-Echo:hello%0aworld%0a
>
* HTTP 1.0, assume close after body
< HTTP/1.0 200 OK
< Server: BaseHTTP/0.6 Python/3.2.3
< Date: Wed, 13 Feb 2013 16:44:31 GMT
< Content-Type: text/html
<
hello
world
* Closing connection #0

real 0m0.014s
user 0m0.006s
sys 0m0.004s

The code is very simple and probably not follow the HTTP specification in some situations. I want to post it as it could be a starting point if you need to develop your testing server which only respond simple stuff, it can run with Python 2 or Python 3. I use similar code in my unittest, running in thread, and it’s much faster, 0.01s for a request.

By the way, Python has a nice SimpleHTTPServer module, probably one of my favorite modules, it always comes in handy whenever I need to serve files from a directory. I even have a Bash alias set up for it.

Confused by the title? I was.

So, I was browsing through GitHub Explore as usual and Markdown.css showed up in the list. It took me literally several seconds until I finally realized that it actually does:

Use the markdown.css file to make regular HTML look like plain-text markdown. No JavaScript hacks are needed. View the demo to see what I’m talking about.

I was like, at first, did it mean you write CSS in Markdown? Or Markdown in CSS? Or CSS in Markdown-like syntax Or Markdown in CSS-like syntax? And pondered how on Earth any of those make sense until I understood.

So, to see it in action by clicking this button:

I have to say, I kind of like the look of Markdown’d version of my blog. It looks so clean1, funny to say that, because I thought my blog design was already clean.

While read through the Markdown.css issues, I realized that I had seen similar one before, ReMarkdown, though it’s with different concept. ReMarkdown focuses on presenting more precise re-markdown’d of the HTML, you have to add classes for specific options to fine tuning it. As for Markdown.css, you have just one stylesheet to apply on, but the result is pretty close to the Markdown source would look like.

However, in the end, they are just for fun more rather than as being a real converter in my opinion. Nevertheless, the creativity is the point of making them. Who knows, maybe someone would use them with sophisticatedly tagged HTML with classes, so the entire HTML can be switched between HTML and Markdown as the View Source option.

[1]Except for the inline-linking syntax [text](url). They are pretty hard to read when a paragraph with several links.

If you have a blog with more than a thousand of posts, what are you going to do with broken links? Or the question should be how can you know if the links in your posts are still working? Links fail to work all the time and that’s no surprise, and if you hope readers would help report, well, you can jut forget it. You have to check them on your own.

But you know that’s an impossible task. So, I was thinking how on Earth I can check the links. two years ago, I wrote a shell script linkckr.sh. It’s a simple script to check a HTML file or URL, but it definitely not for checking entire blog.

And that was when lnkckr came into the picture, a Python 2/3 library with command-line script, supports list of links, HTML, and Blogger XML Export file. You feed it with the XML file, and it gets to work for you.

https://blogger.googleusercontent.com/img/b/R29vZ2xl/AVvXsEhgI3ia4IvhytZ4X_hkDeiTNKIQz2e4cIzf8hzuxYczerTW-Ikob1Cc2jwT2d7q8xnFkHVXSVIkKANuNhc5l0z2Dv44G3D5wgsoxt-YygTMq8REov9AdGJn7GdO9yBaJ8T526bV9qlttSk/s800/lnkckr-blogger.png

I have also updated b.py to add new command for using lnkckr to check links, I can now check the links within Vim while writing this blog post in reStructuredText. This could save some troubles when you add broken links and you don’t even realize. Believe me, many bloggers do that a lot.

lnkckr not only checks links as in anchors <a/> but also the images, iframes, or anything elements with attributes href and src. So it’s fairly thorough checking. It also does quick check on fragment part of URL. Some #id also disappear after some time.

Originally, I had thought of adding this checking function to bea, which already does some analysis on Blogger XML Export file, but I dropped the idea when I saw more potential for lnkckr to be standalone. It loads Blogger XML Export file, and can be extended to support WordPress export file or anything other data dump files.

lnkckr is pretty new and probably still very buggy. Any feedback is welcome!

Until today, I was totally unaware of du options --all (-a), --one-file-system (-x), and --separate-dirs (-S). All I had done with it before was du -sh, occasionally, du -h --max-depth=1.

That’s all I knew about du. If I’d need to list the files by the file size, then I’d use find with -printf '%s %p\n' like in this thread. I had no idea you could use du for files, I always thought it was only for directories.

After read the first reply and the manpage, I now know I could just run:


du -axS | sort -h | tail

But it’s not perfect because we most likely would only be interested in files, not directories; unfortunately, du can not filter out directories for you. As a matter of fact, we use -a to include files at first place. Also note that -S is a crucial option, without it upper directory’s size will include sizes of sub-directories’ sizes, not just the files reside directly under it.

Even though it includes directories, the one-liner is good enough for me, or you can have the following one if you insist to have directories excluded:


find -type f -printf '%s %p\n' |
sort --numeric-sort |
tail |
while read size path; do
S=$((size/1024/1024))
if ((S)); then
echo ${S}MB $path
else
S=$((size/1024))
if ((S)); then
echo ${S}KB $path
else
echo ${size}B $path
fi
fi
done

or a simplier version since we are looking for largest files:


find -type f -printf '%s %p\n' |
sort --numeric-sort |
tail |
while read size path; do
echo $((size/1024/1024))MB $path
done

I’ve replied with multiple options and simple runtime comparison to that thread.

You always can learn a few things about using commands, and it seems to be impossible to use a Unix-like command to its full potential in my opinion. You know the knowledge of those commands have been written for very long time, only no one really RTFM. Every time I read a manpage, I always learn something I didn’t know not something new, and for what I’ve just learnt, they may not be the reason of why I read manpage. manpage is full of surprises.

When writing in Bash, ever wanted to print a separator line as you do in Python? I bet you certainly have, the multiplication operator on string or other sequence types is always useful when you need it to do some quick concatenation of copies.

print '-'*58
----------------------------------------------------------

It can’t be simpler than that, what about in Bash? I used to do like this and I thought I was clever:

printf -v sep '%*s' 58
echo "${sep// /-}"
----------------------------------------------------------

It uses printf‘s field width from argument, indicated by *, to achieve producing a blank string in specific width, where %s receives no input. There a blank separator line is generated, then being processed with string substitution. You can also simply use %58s.

It works, but I always feel it’s a bit of awkward. Firstly, you need a $sep to store the separator line—blank, literally, in order to replace spaces with dashes. Secondly, you use a second command to print, not really a big deal, just awkward as I would describe.

I decided to look for really clever code and I found this Stack Overflow question, I recommend you read all answers. Bad or good, you will get a sense or a good laugh. Some of them are really awkward, those are just trying to sneak in an answer and hope to get a few upvotes.

1   printf

Quick answer:

printf -- '-%.s' {1..58} ; echo
----------------------------------------------------------

1.1   Explanation

-- is for indication of the end of options for printf, the leading - in format string can confuse printf, make it think that’s an option.

%.s is like %s but with specified precision or maximal length in %s term, in this case, it’s zero as it’s omitted. If you want to print abcde but truncating it to just first 3 character, you can use %.3s.

If the precision is given as just ‘.’, or the precision is negative, the precision is taken to be zero.

If a precision is specified, no more bytes than the number specified are written, but no partial multibyte characters are written.

man 3 printf

In plain English, %.s results zero-length string; with - leading, that results - as the output.

{1..58} performs a Bash Brace Expansion, it expands into 1 2 3 ... 58, so the command actually is expanded into:

printf -- '-%.s' 1 2 3 [...] 58 ; echo

Now, upon the execution, from Bash manpage:

The format is reused as necessary to consume all of the arguments. If the format requires more arguments than are supplied, the extra format specifications behave as if a zero value or null string, as appropriate, had been supplied.

So, the format is actually being used 58 times, i.e. 58 dashes.

1.2   Pros and Cons

Generally, this is a good way to print a separator line. Only it has two drawbacks:

  1. newline needs to be printed separately as you see the attached echo in the end.
  2. {1..$length} can’t be done as you’d like, because Brace Expansion precedes Parameter Expansion. So, it’s {1..$length} after Brace Expansion, then {1..58} after Parameter Expansion and that’s the final output, you get a string like that literally.

If you really need it, you would have to use eval:

length=58
eval printf -- '-%.s' {1..$length} ; echo

2   echo | tr

I noticed one answer from that Stack Overflow question, which uses echo and Brace Expansion, although it’s not perfect, but it can be fixed with tr. First to see why it’s not perfect:

echo -$___{1..10}
- - - - - - - - - -

As you can see there are spaces between dashes, this is as expected as how the expansion and echo work. To fix it1, simply pipe into tr to delete spaces:

echo -$___{1..10} | tr -d ' '
----------

The command is actually expanded as

echo -$___1 -$___2 [...] -$___10 | tr -d ' '

I am not going to explain how Brace Expansion works here, please see the manpage. The only thing needs to know here is those variables expand into empty string since they have never been assigned, and that results

echo - - [...] - | tr -d ' '

2.1   Pros and Cons

It requires you to specify the dummy variable name prefix, in the case above, it is $___. Those expanded variables have to be sure that they wouldn’t have any values, or the output wouldn’t be expected.

It also has same fate as previous method, eval is needed if separator length varies.

It requires using pipe and external command, you can expect the performance isn’t as good as previous one, but not by much and you can’t really tell by a 80-chars separator line.

Note

Bash has printf as builtin, you normally are not using /usr/bin/printf.

2.2   Alternative separator

If you are looking for some cute separator, then one echo might be enough:

echo '~ *'$___{1..10} '~'
~ * ~ * ~ * ~ * ~ * ~ * ~ * ~ * ~ * ~ * ~

3   printf | tr

This is derived from previous method and my old way, combining both.

printf '%*s\n' 58 | tr ' ' '-'
----------------------------------------------------------

I don’t think I need to explain this.

4   head | tr

This is provided by commenter Brian:

head -c 58 </dev/zero | tr '\0' '-'
----------------------------------------------------------

It uses head to grab an amount of null character from /dev/null and uses tr to convert then to desired separator character.

4.1   Pros and Cons

It’s a oneliner and you can use variable for the length of the separator.

It uses two external commands, head and tr.

5   Speedtest

time for i in {1..100}; do printf -v sep '%*s' 58 ; echo "${sep// /-}" >/dev/null ; done
time for i in {1..100}; do printf -- '-%.s' {1..58} >/dev/null ; echo >/dev/null; done
time for i in {1..100}; do echo -$___{1..58} | tr -d ' ' > /dev/null ; done
time for i in {1..100}; do printf '%*s\n' 58 | tr ' ' '-' > /dev/null ; done
time for i in {1..100}; do head -c 58 </dev/zero | tr '\0' '-' >/dev/null ; done
time for i in {1..100}; do echo ---------------------------------------------------------- >/dev/null ; done
real    0m0.008s
user    0m0.007s
sys     0m0.001s

real    0m0.012s
user    0m0.010s
sys     0m0.002s

real    0m0.142s
user    0m0.006s
sys     0m0.038s

real    0m0.137s
user    0m0.013s
sys     0m0.035s

real    0m0.130s
user    0m0.003s
sys     0m0.035s

real    0m0.003s
user    0m0.002s
sys     0m0.001s

6   Conclusion

There probably is other ways to print a separator line, here is five I can give you:

printf -v sep '%*s' 58 ; echo "${sep// /-}"
printf -- '-%.s' {1..58} ; echo
echo -$___{1..58} | tr -d ' '
printf '%*s\n' 58 | tr ' ' '-'
head -c 58 </dev/zero | tr '\0' '-'
echo ----------------------------------------------------------

Nothing is absolutely great or terrible. Pick up one you like.

7   Changes


[1]If anyone wants to sign a “- - - - - is also a separator” petition, please free feel to do so.

Yes, the thing below, that is a chart of the change of my ToDo list in number of lines over time, beginning with this year. And, no, it’s not some kind of new year’s resolution or any kind of top-secret project. It’s just a simple record of the number of lines. I was curious to see how fluctuated my ToDo would be in number of lines when I was editing.

On the top, it’s the ToDo list we all know about. The thing that you shove things in, tasks you don’t have time to deal with at the mean time, ideas we all know are just dreams—never can be some world changing inventions, stuff you don’t want to take care of, or blahs you just don’t give a dime. That’s the ToDo list.

On the bottom, the ToDo Bin as I called it, it’s also a ToDo list with “bin” attached. If ToDo list is like a garbage bin, then ToDo Bin is the garbage bin of ToDo list barbage bin. A bin of a bin, how awesome is that? It’s the ultimate Bin, that means whatever goes into ToDo Bin, it’s never gonna to see another day of light. Ehm…, what I mean is the task is never going to get done.

When my ToDo list smells stinking from rotten tasks, I discard them into ToDo Bin. Cough! I mean I move those into ToDo Bin. You can see some sudden increase by significant amount of numbers at lower chart. Almost 1,020 lines in the bin already.

I try to keep ToDo clean as best as I can, well, not really by finishing the tasks. Just somehow make some lines disappeared mysteriously. At this moment, it only contains 10 lines.

It’s only been one month, it may look even more interesting one year later. Or more stinking? Anyway, it’s fun to see something totally meaningless and not so useful to help you do better.

So, readers, it’s time to add “charting my todo list” task to your todo list!

hint.css is a nice library in pure for forgetting the oldie-yellowish-boring tooltip, written in Sass. I now use it in New Year’s Resolution Generator, which was born a month ago and I had been making it look prettier every now and then whenever I had time.

https://blogger.googleusercontent.com/img/b/R29vZ2xl/AVvXsEjHVY4KRg3q052Clxn8slkc0Mktf5SaPpHZC3iAj5vuWOy-AYwGCxC501MfPzENczEmiyjF4hmlf5fQYK6QldLorlvo10srW6HYxYTUNBMMyeQ_RGw3S-SS25Sx9gBZuTdCtYOViWczHJU/s800/hint.css.png

Screenshot of current New Year’s Resolution Generator with hint.css’ tooltip

Note

The content on this page requires JavaScript and the embedded style within the post; if you are reading from feed reader, they may be stripped.

1   Four ways

hint.css can show hint text on one of four sides of the text. Hover on the text below, the tooltip will show. The content in the hint text is the used CSS classes.

, , , , , , , , , ,

The syntax is fairly simple, just assign the hint.css’ class and the hint text in data-hint attribute.


<span class='hint hint--top'
data-hint='the hint text'>normal text</span>

2   Four + 2 types

2.1   Four predefined admonitions

It also supports four different predefined admonitions, they are basically styled with common colors for those types of messages.

ERROR, INFO, WARNING, SUCCESS

2.2   “Always” “Rounded”

If you look closer at the screenshot at beginning of this post, you would notice the tooltip has rounded corners, but the live examples above do not. Since version 1.1.0, a new hint--rounded class is supported for rounded corners:

ROUNDED INFO

If, for some reason, you need to tooltip to show permanently, you can use hint--always class:

ALWAYS, ALWAYS INFO, ALWAYS ROUNDED SUCCESS

3   Extending

3.1   Custom color/style

This part needs little more work if you indeed need some special color or even little dynamic colors and/or styles. You can always add your CSS rule to override with specific ID/class. For example,


.hint--red:after {
background: #f00;
}

You add the custom class to the text, then you shall have a hintext with red background. Here is a little complicated example, with poetic feeling in the air:

Roses are red,
Violets are blue,
Sugar is sweet,
And so are you.

The background and other stuff are removed, the tooltip’s triangle’s color is changed to white, so is the text color to match the poem:


.hint--bare.hint--left:before {
border-left-color: #fff;
}
[...]
.hint--bare:after {
padding: 0.5em;
border: none;
background: none;
font-size: 2em;

box-shadow: none;
}
.hint--rose:after {
color: #ff007f;
}
[...]

4   Fun: Merry-go-round

Just keeping switching the class to have tooltip traveled from one side to next side. It’s not smooth as you would like in browser supporting CSS Transitions on pseudo elements, it should be fixable, however, that wouldn’t be really useful anyway.

Merry-go-round

5   Final thoughts

I like this tooltip library, it’s in pure CSS. If CSS expression attr() can fully support more than just content property, then it could be more powerful. For example, you may be assigning the different color to each text’s hints:


<span class='hint hint--top' data-hint-background='#f00' data-hint='hint'>text</span>
<span class='hint hint--top' data-hint-background='#0f0' data-hint='hint'>text</span>
<style>
.hint:after {
background: attr(data-hint-background color);
}
</style>

Unfortunately, it isn’t working in Firefox 17 and Google Chrome 24. Firefox stripped the style and Chrome told me that property value is invalid. If neither of them support that, then I doubt other browsers would support.

I hope I can use it for New Year’s Resolution Generator, which stores the colors in JavaScript code and the elements are created on page load. If current browser supported attr() on other CSS properties, then it would be perfect. The color doesn’t have to be fixed in stylesheet. Currently, the generator writes CSS styles for each element’s hint text.

The library should work well for most of cases, just include the stylesheet, and it’s good to go. The minified version is about 4K, gzip’d about 1K, small cost to pay if you would use it throughout the entire website.

By the way, I notice one thing quite interesting is the note of hint.css:

CSS3 Transitions on pseudo elements is currently available on Firefox only. On rest of the browsers it degrades gracefully without any transition. Though the good news is that it will be coming soon on Webkit also.

I always thought Webkit is bolder on experimental stuff than Firefox, -webkit was always something before anything (Got it?). Well, not this time.


6   Changes

  • 2013-02-22T09:42:17Z: update for version 1.1.0 and the new hint--rounded class.

One and a half years ago, I released first version of vcsstat.sh and I regularly use it to check my commit statistics. A few days ago, I stared to modify vcsstat.sh, then hours ago, I had an idea, inspired by GitHub’s Contributions calendar, which they added last month with some other features as new contribution tab in GitHub profile page.

Now, I have similar calendar right in terminal, just the way I like it.

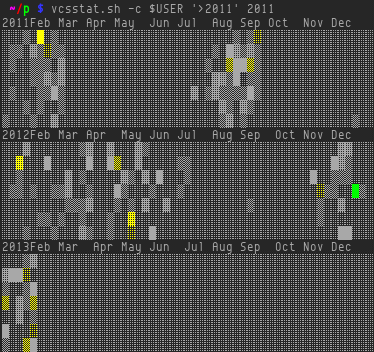
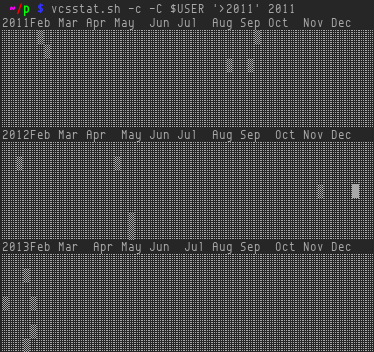
The following screenshot was take from output of new version 0.2. The box-drawing Unicode characters and colors render the different amount of commits. The calendar is just like the one on GitHub, but always starting from ISO week 1 at the leftmost column. The rows are starting from Monday to Sunday, 7 rows for each year.

https://blogger.googleusercontent.com/img/b/R29vZ2xl/AVvXsEjbJmCu5e-ltgVVZgkE04CCpEpFqz3IVPYpX5LcgjWbne8V4Z-kEiNKQNA6V3GBEqshR3Qk_YEqVGR_aobanQge6EkPe1gpNwdmmpyAGDSk3FN6rC_xN-sKOLtj2K1w7v7LlLpIXfgte4M/s800/vcsstat.sh%2520-%2520commit%2520calendar.png

Commit calendar

The calendar prints out full years, from year of first commit to year of last commit. You can see there is a header line of abbreviation of months, with the year number replacing the position of January.

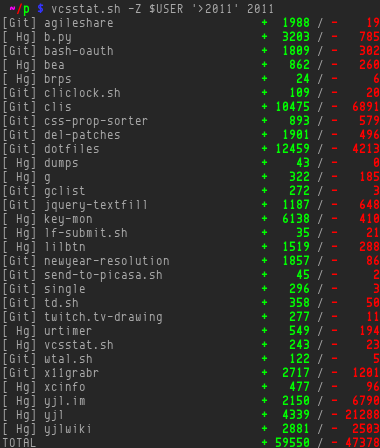
The corresponding list of changes, additions and deletion, is shown below.

https://blogger.googleusercontent.com/img/b/R29vZ2xl/AVvXsEir7cYkh8yJ-pp2JtOjmfG3AgaqjEFs-ug2s7eizoHuV_RDFE4oLjyN9gfWT-piufnTRTV1Oe5N2XfMbo5rMEldVFRpxsaAY7Qnk5ewwv4QqAOQtQEfrfNBNur9WA9D_6f02mMD4gXXDO8/s800/vcsstat.sh.png

This is basically what vcsstat.sh did before, I only added a total number for this output, although I did edit the code for little better performance.

The calendar uses Unicode and ANSI colors to render, some may not like them or environment may not be able to support, so I also added some options to turn them off. Next screenshot shows output without colors:

https://blogger.googleusercontent.com/img/b/R29vZ2xl/AVvXsEjZAdAvj-3CkYAWNFa29V4eBTuK1KE6ZLABl0afGpc8fva1sQcCEgMol131pNCOxMyLB06aROi0jHCOv1T0aLVsbHht2ckJCWm-VJKvdXGPzwkAhqmQOIJwUlm_1vErGiNikhX4KvUqHRY/s800/vcsstat.sh%2520-%2520commit%2520calendar%2520-%2520no%2520color.png

Disable color output

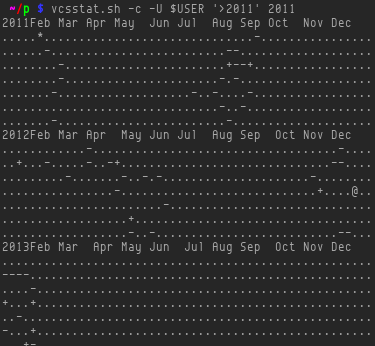
The final one is non-Unicode output:

https://blogger.googleusercontent.com/img/b/R29vZ2xl/AVvXsEgsZlVcD4Xfm4bFSh6SiZHIZ2-k44lUus78kTIKcLagaNpH8QtnolJ2V41Fo0HWEgU5n7kHD4buZPKe9PDDEECpp3d60VRZLNWbKsHHgqpafiu5nmKPLddNQSxYllJegsLhNyfzBTWNLLM/s800/vcsstat.sh%2520-%2520commit%2520calendar%2520-%2520no%2520Unicode.png

Disable Unicode output

There may be some confusing between different outputs, but the calendar is—I’d say—just for a feeling, don’t look into it too seriously. If you would like to try it, go to vcsstat.sh project. It’s just a Bash script and it can scan current (sub-)directory of Git or Mercurial repositories.